Quick Start Guide: 10 Minute Setup
This guide will get your RichWP GrowRich plugin up and running in about 15 minutes. We’ll set up Stripe integration, create a basic digital download product, and add a buy button to test the complete purchase flow.
Table of Contents
- Quick Start Guide: 10 Minute Setup
- Step 1: Install the Plugin and Verify License
- Step 2: Stripe API Keys – Live Shop or Sandbox
- Step 3: Set up Stripe Webhook and Stripe Webhook Secret
- Step 4: Create Required Pages
- Step 5: Set Up a Downloadable Product or Paywall Product
- For Downloadable Product
- For Paywall Product
- Step 6: Add a Buy Button to a Page
- Step 7: Test the Complete Flow
- Congratulations!
Step 1: Install the Plugin and Verify License
- Log into your RichWP Account and download the
richwpgrowrich.zipfile to your computer - In your WordPress admin, go to Plugins → Add New → Upload Plugin
- Click Choose File and select the ZIP file
- Click Install Now then Activate

Verify License
In your RichWP Account account, navigate to “My Licenses” to find your license code.
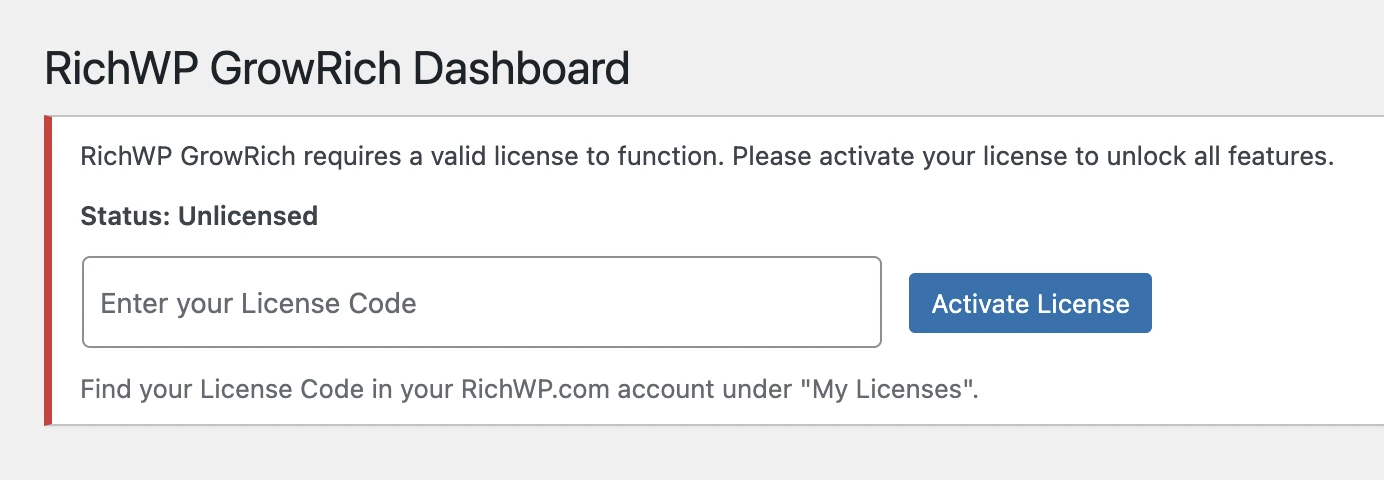
Copy the license code and paste it into the “Enter your License Code” field on the RichWP GrowRich Dashboard, then click “Activate License” to unlock all plugin features.

Step 2: Stripe API Keys – Live Shop or Sandbox
Decide if you want to setup a live shop or play with a Stripe Sandbox first. If you decide for a sandbox, set one up from the Stripe Account menu:
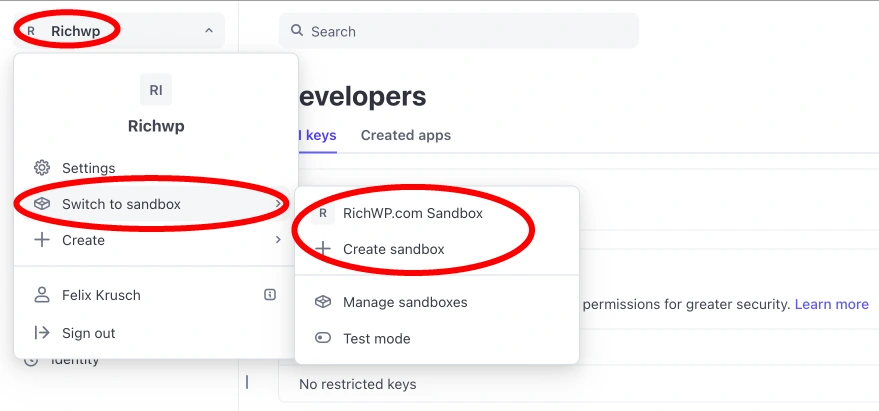
More about Stripe Sandboxes: https://docs.stripe.com/sandboxes (good idea to play with a sandbox first!!!)
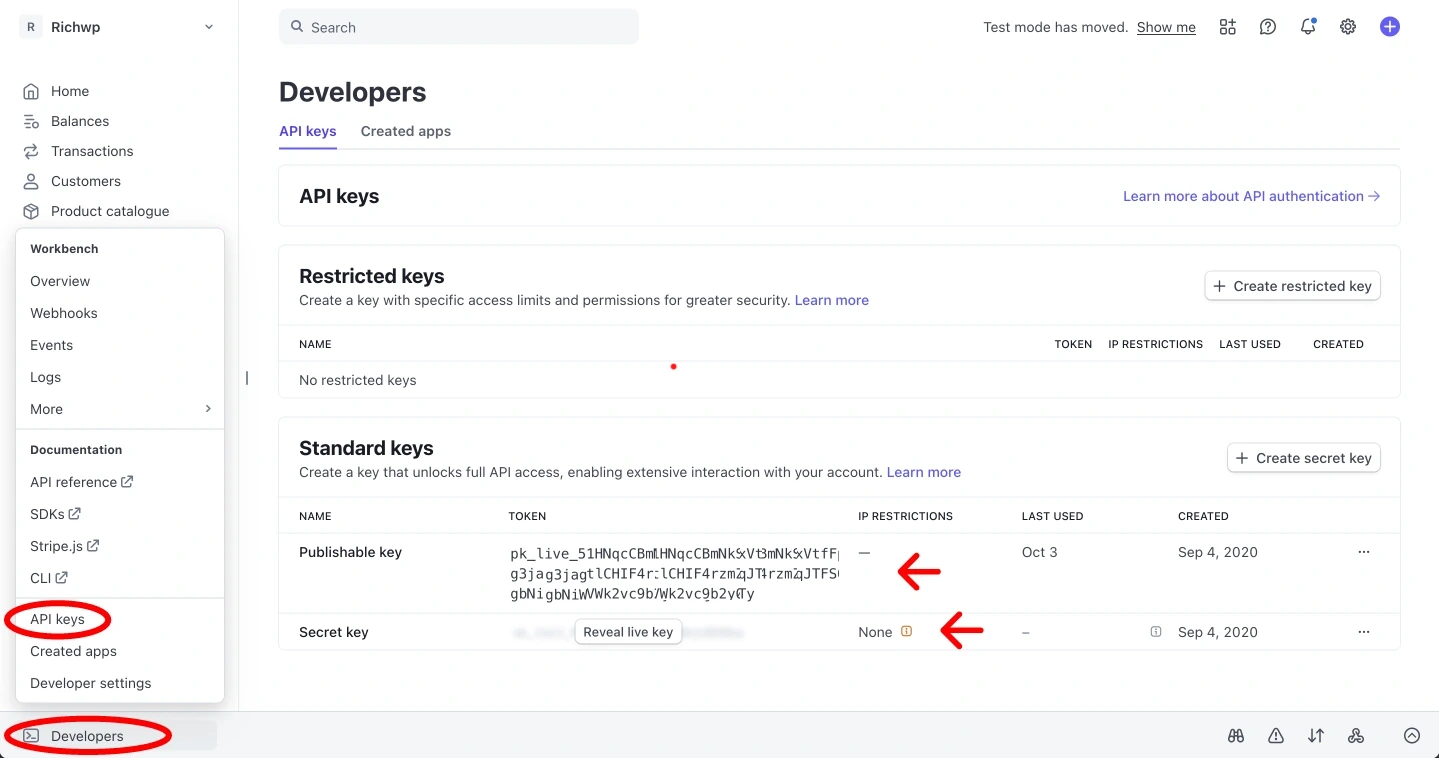
Let’s start by logging into your Stripe account and locate the API keys under Developers → API keys
Step 2.1: Configure Stripe API Keys
Go to RichWP GrowRich → Settings → Stripe in your admin menu and copy/paste your your Stripe API keys:
- Publishable Key:
pk_live_...orpk_test_... - Secret Key:
sk_live_...orsk_test_...
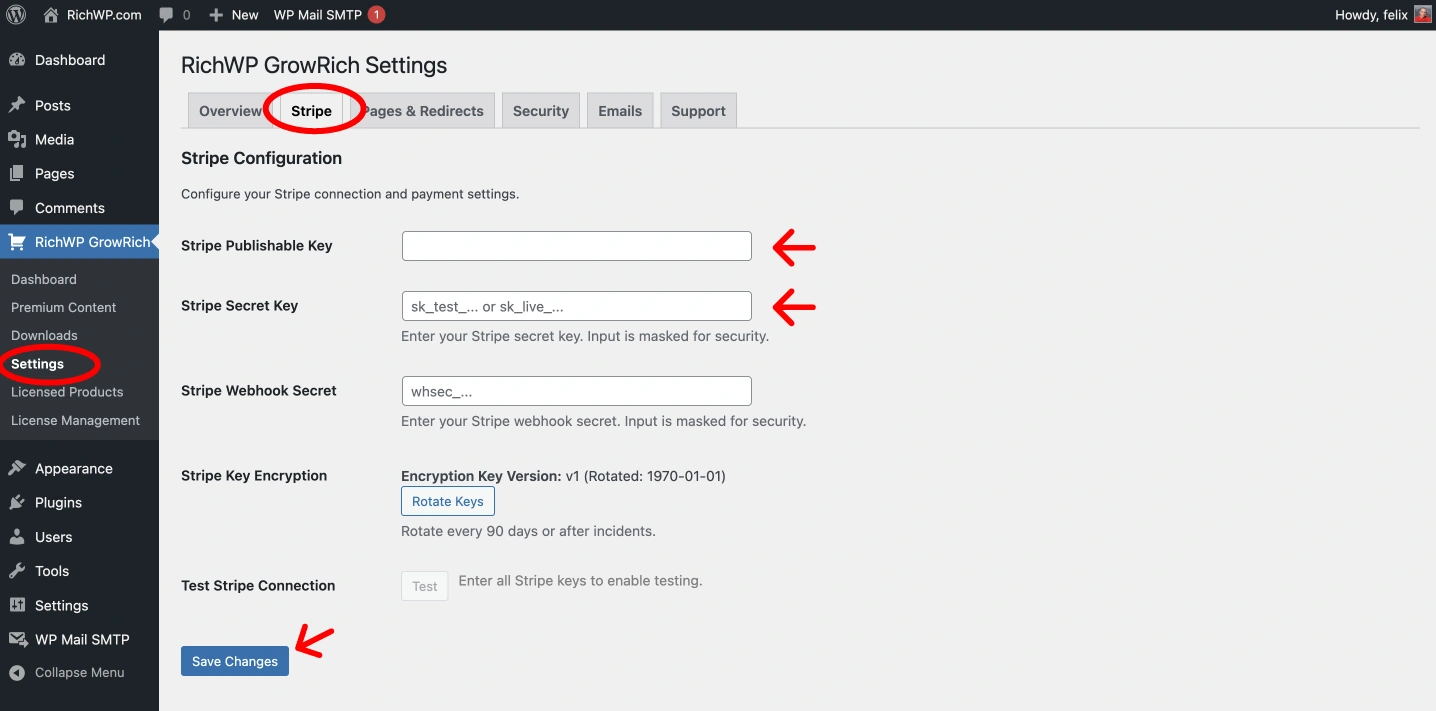
- Click Save Changes
For security reasons, when you save your Stripe API keys, the Stripe Secret key will not be displayed anymore and a green success message will be displayed underneath:

Step 3: Set up Stripe Webhook and Stripe Webhook Secret
RichWP GrowRich requires Stripe webhooks to automatically update user access rights when purchases are completed. Follow these steps to configure webhooks in your Stripe dashboard.
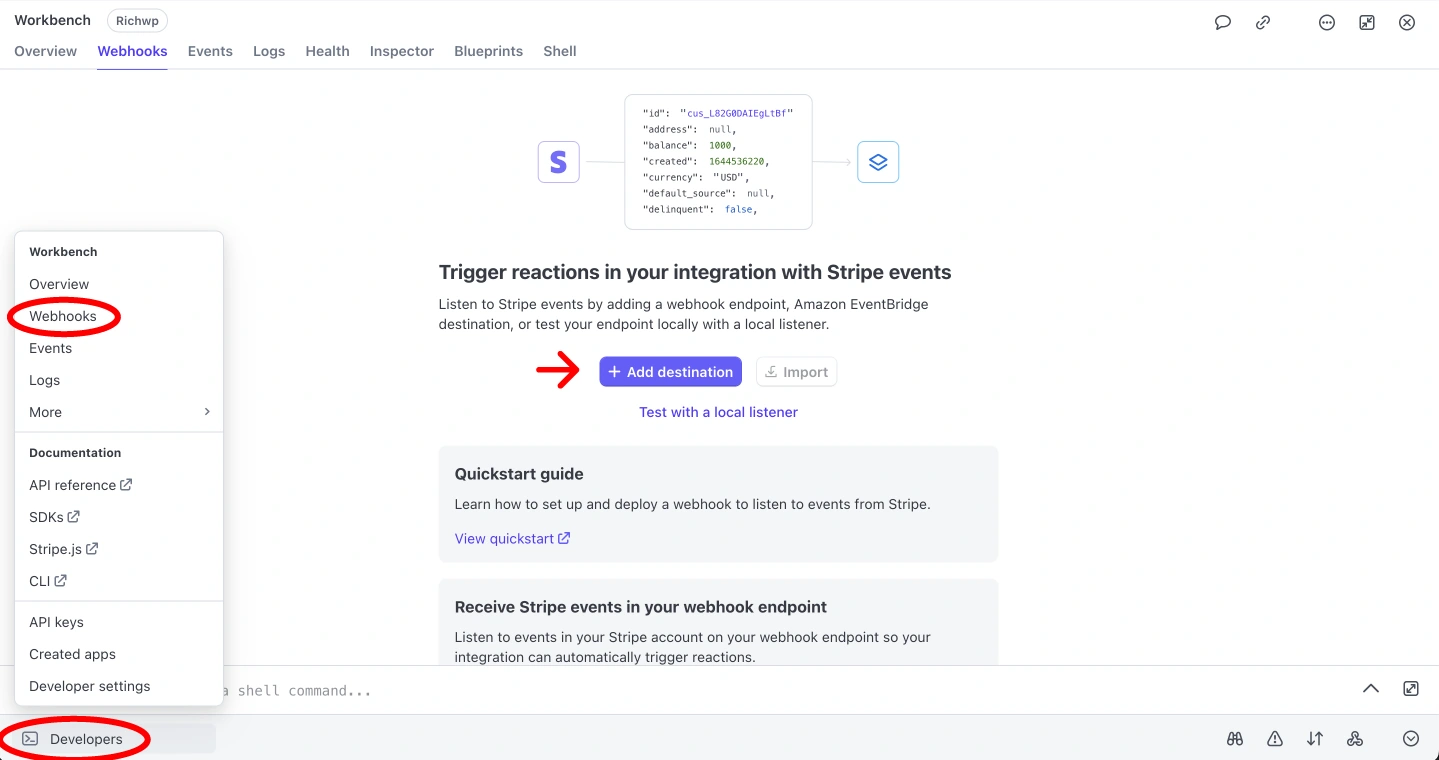
Step 3.1: Access Your Stripe Dashboard
- I guess you are still logged in, if not log in to your Stripe Dashboard
- Navigate to Developers → Webhooks in the left sidebar
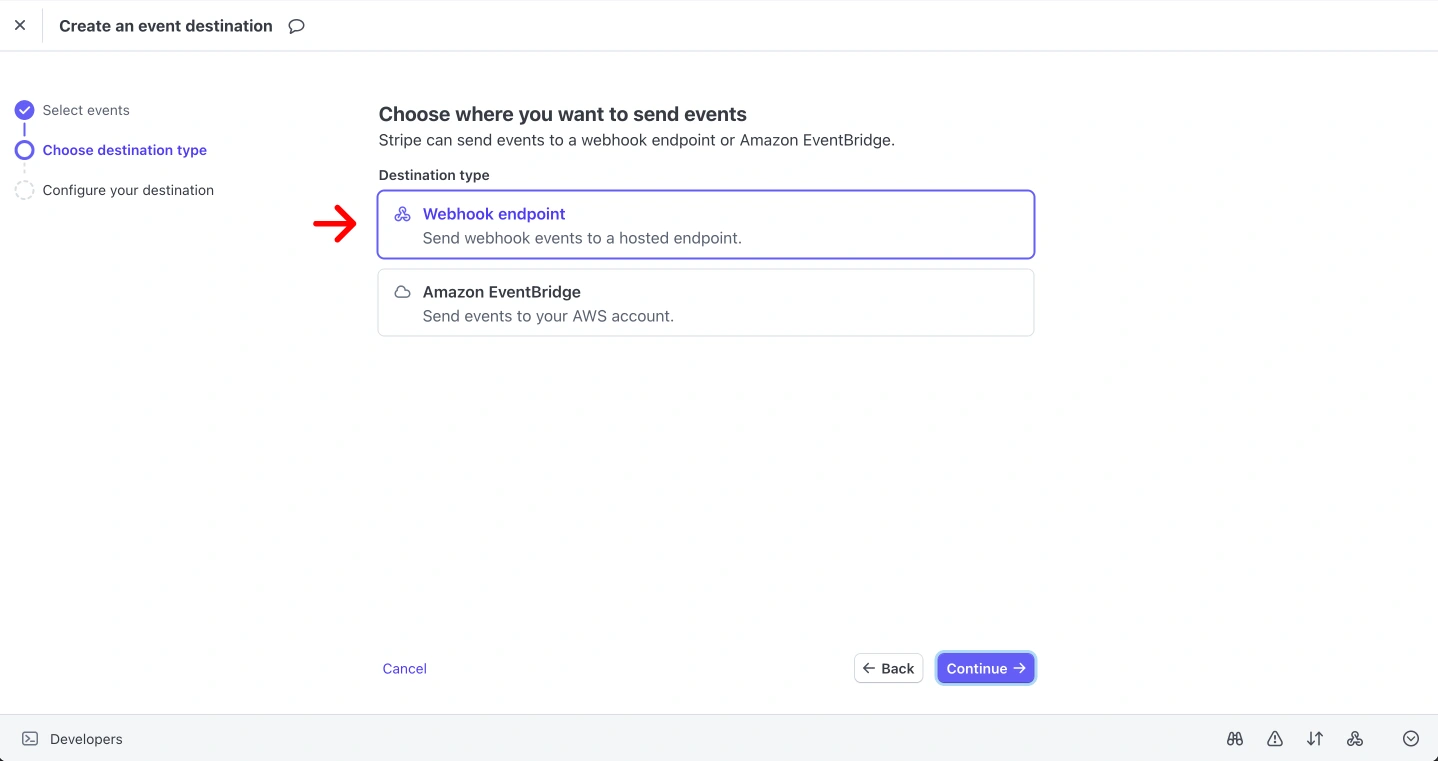
- Click “Add destination”
Step 3.2: Configure the Webhook Endpoint
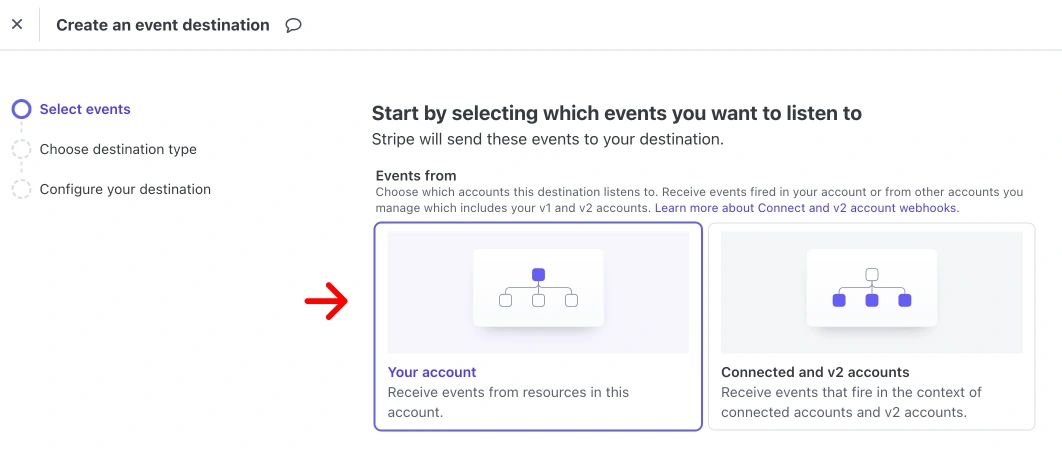
Select Events to Listen For
Select these specific events that RichWP GrowRich processes:
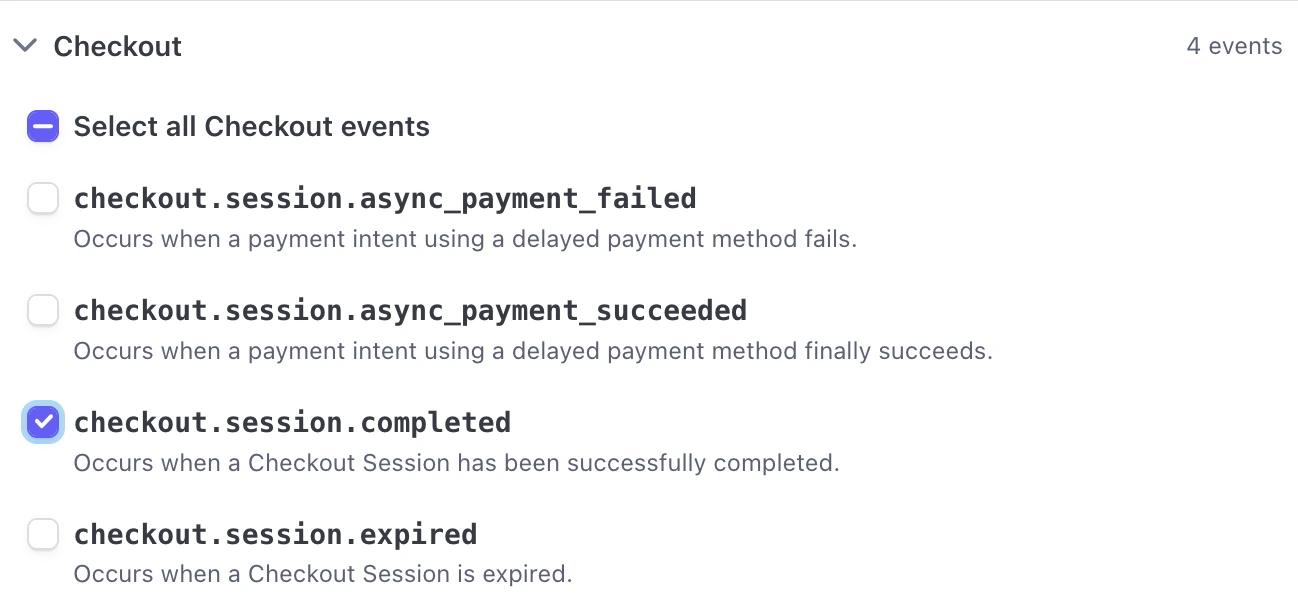
- Checkout
»checkout.session.completed– When one-time purchases are completed - Invoice »
invoice.payment_succeeded– When subscription payments succeed - Customer »
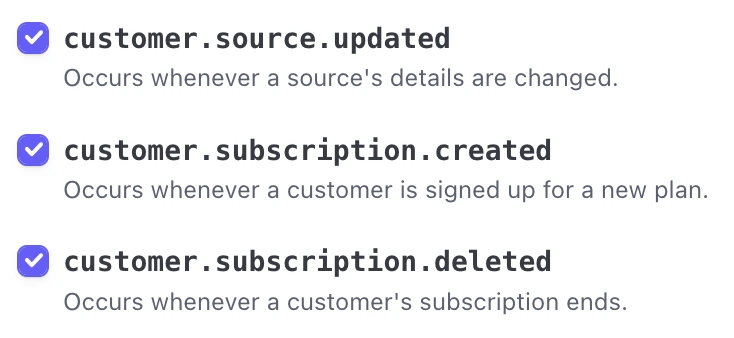
customer.subscription.created– When new subscriptions are created - Customer »
customer.subscription.updated– When subscriptions are modified - Customer »
customer.subscription.deleted– When subscriptions are cancelled

Setting the Endpoint URL
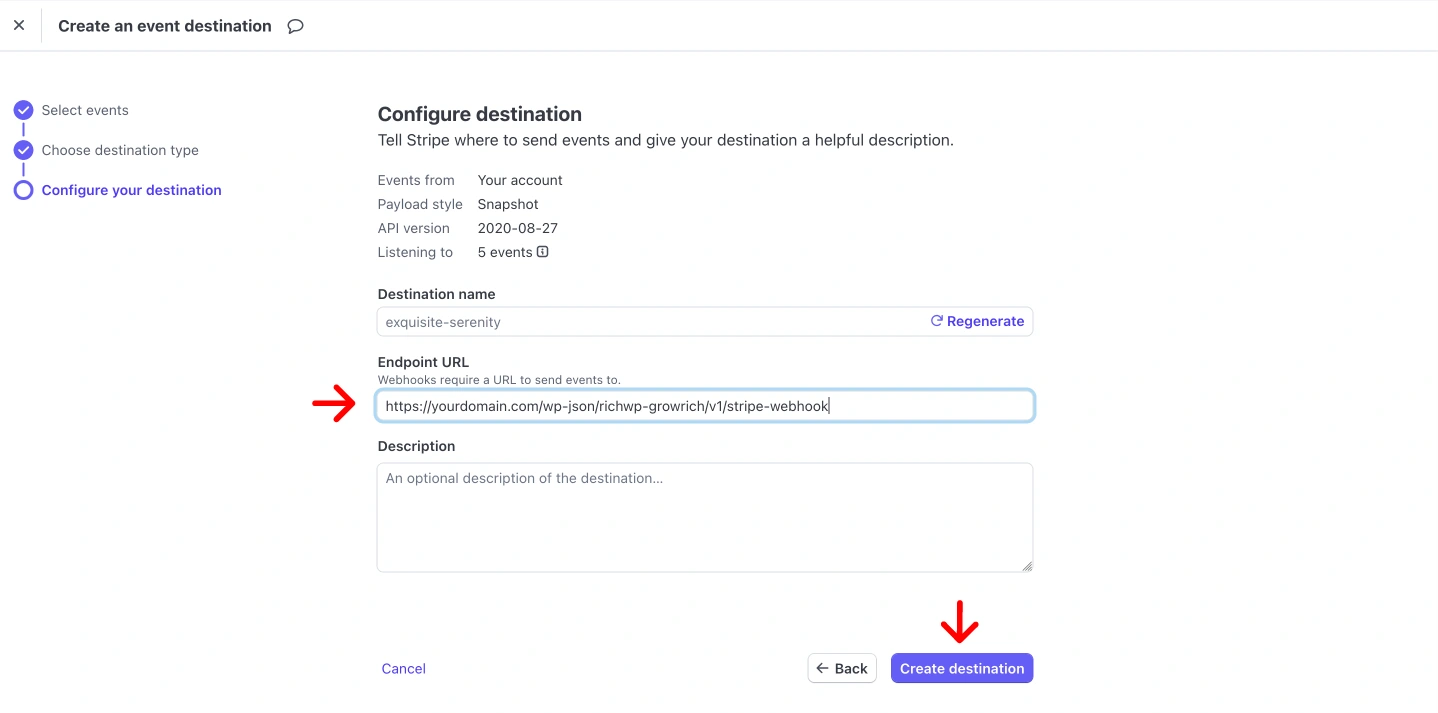
Your destination URL will be:
https://yourdomain.com/wp-json/richwp-growrich/v1/stripe-webhookReplace yourdomain.com with your actual WordPress site domain.
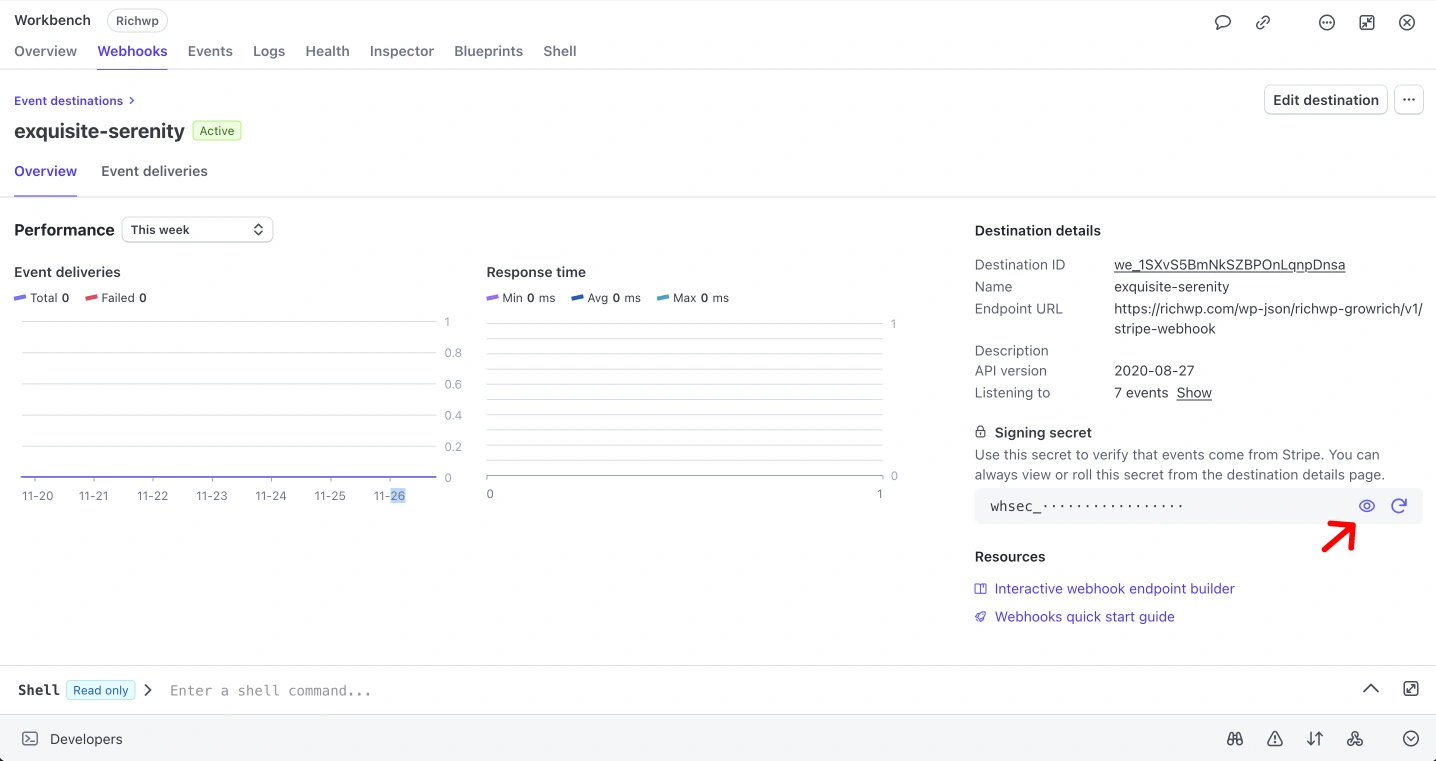
Step 3.3: Get the Webhook Secret
After creating the endpoint, Stripe will display the Webhook Signing Secret. This secret is used to verify that webhook requests are actually from Stripe.
- Copy the webhook signing secret (it starts with
whsec_) - Keep this secret secure, never share it publicly
Step 3.4: Configure in RichWP GrowRich
- Go to RichWP GrowRich → Settings → Stripe tab in your WordPress admin
- Paste the Stripe Webhook Secret into the “Stripe Webhook Secret” field
- The plugin automatically encrypts this secret for security
- Click “Save Changes”

For security reasons, when you save your Webhook Secret, it will not be displayed anymore and a green success message will be displayed underneath:

Step 3.5: Test the Stripe API Key Setup and Webhook
- In the RichWp GrowRich Settings » Stripe Tab click the “Test Stripe Connection” Button to test your setup.

- You can also use Stripe’s webhook testing tools in their dashboard
Important Notes
- Webhook URL: Must be publicly accessible (not localhost) !!!
- HTTPS Required: Stripe requires HTTPS for webhook endpoints in production, so make sure your SSL Certificate is up to date.
Troubleshooting
If webhooks aren’t working:
- Check that the endpoint URL is correct and accessible
- Verify the webhook secret is entered correctly
- Check your server logs for any webhook processing errors
- Ensure your WordPress REST API is accessible
The webhook system ensures that user access rights are automatically updated when purchases occur, maintaining the stateless authentication system.
Step 4: Create Required Pages
The plugin needs specific pages for the user experience (Account, Login, Success Pages):
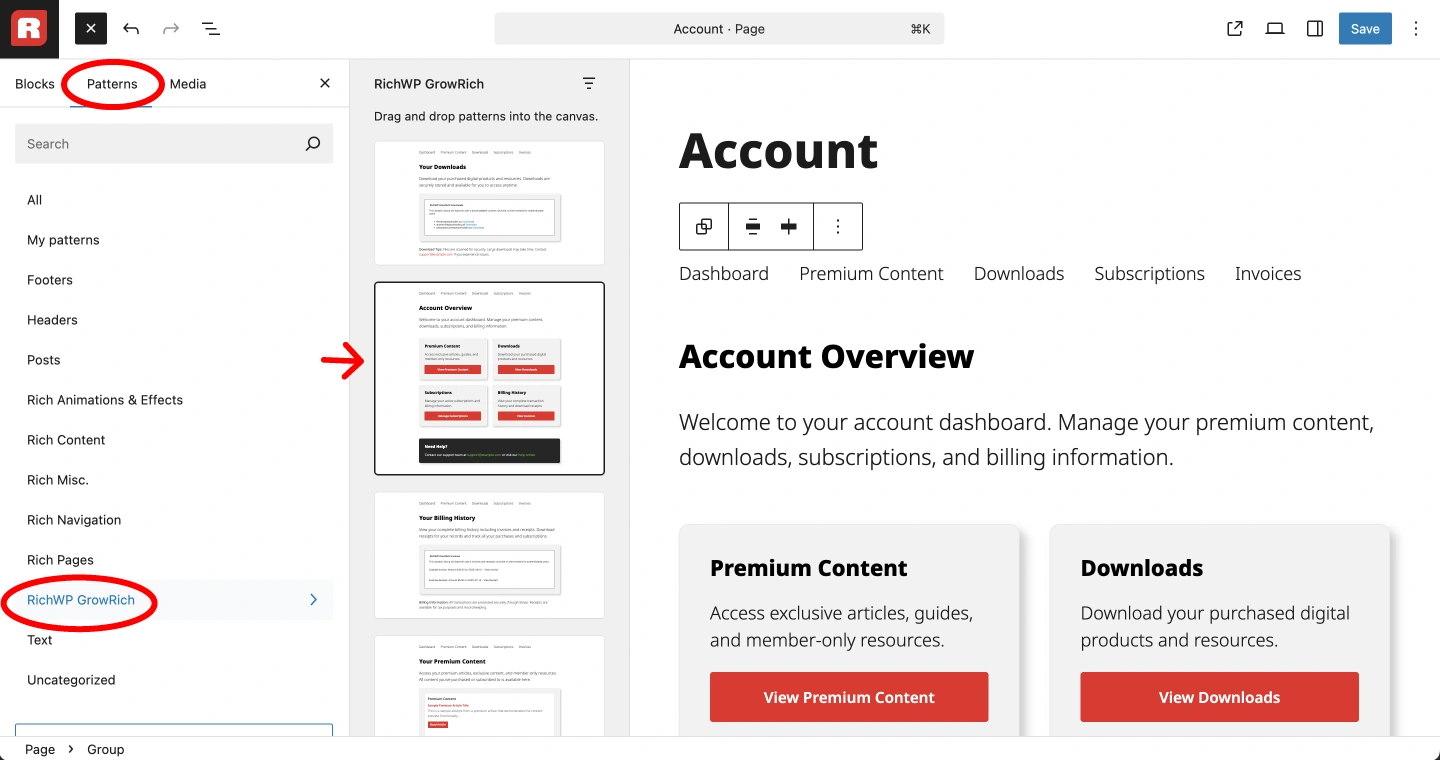
You can edit the ready made patterns or create your own. This assumes that you know how the WordPress Block Editor works.
- Go to Pages → Add New
- Create three pages:
- Account Page: Add the “Account Homepage” pattern, Create subpages for downloads, premium content, invoices, etc. as needed and link them from the menu as well as the buttons (up to you, your site, your rules).
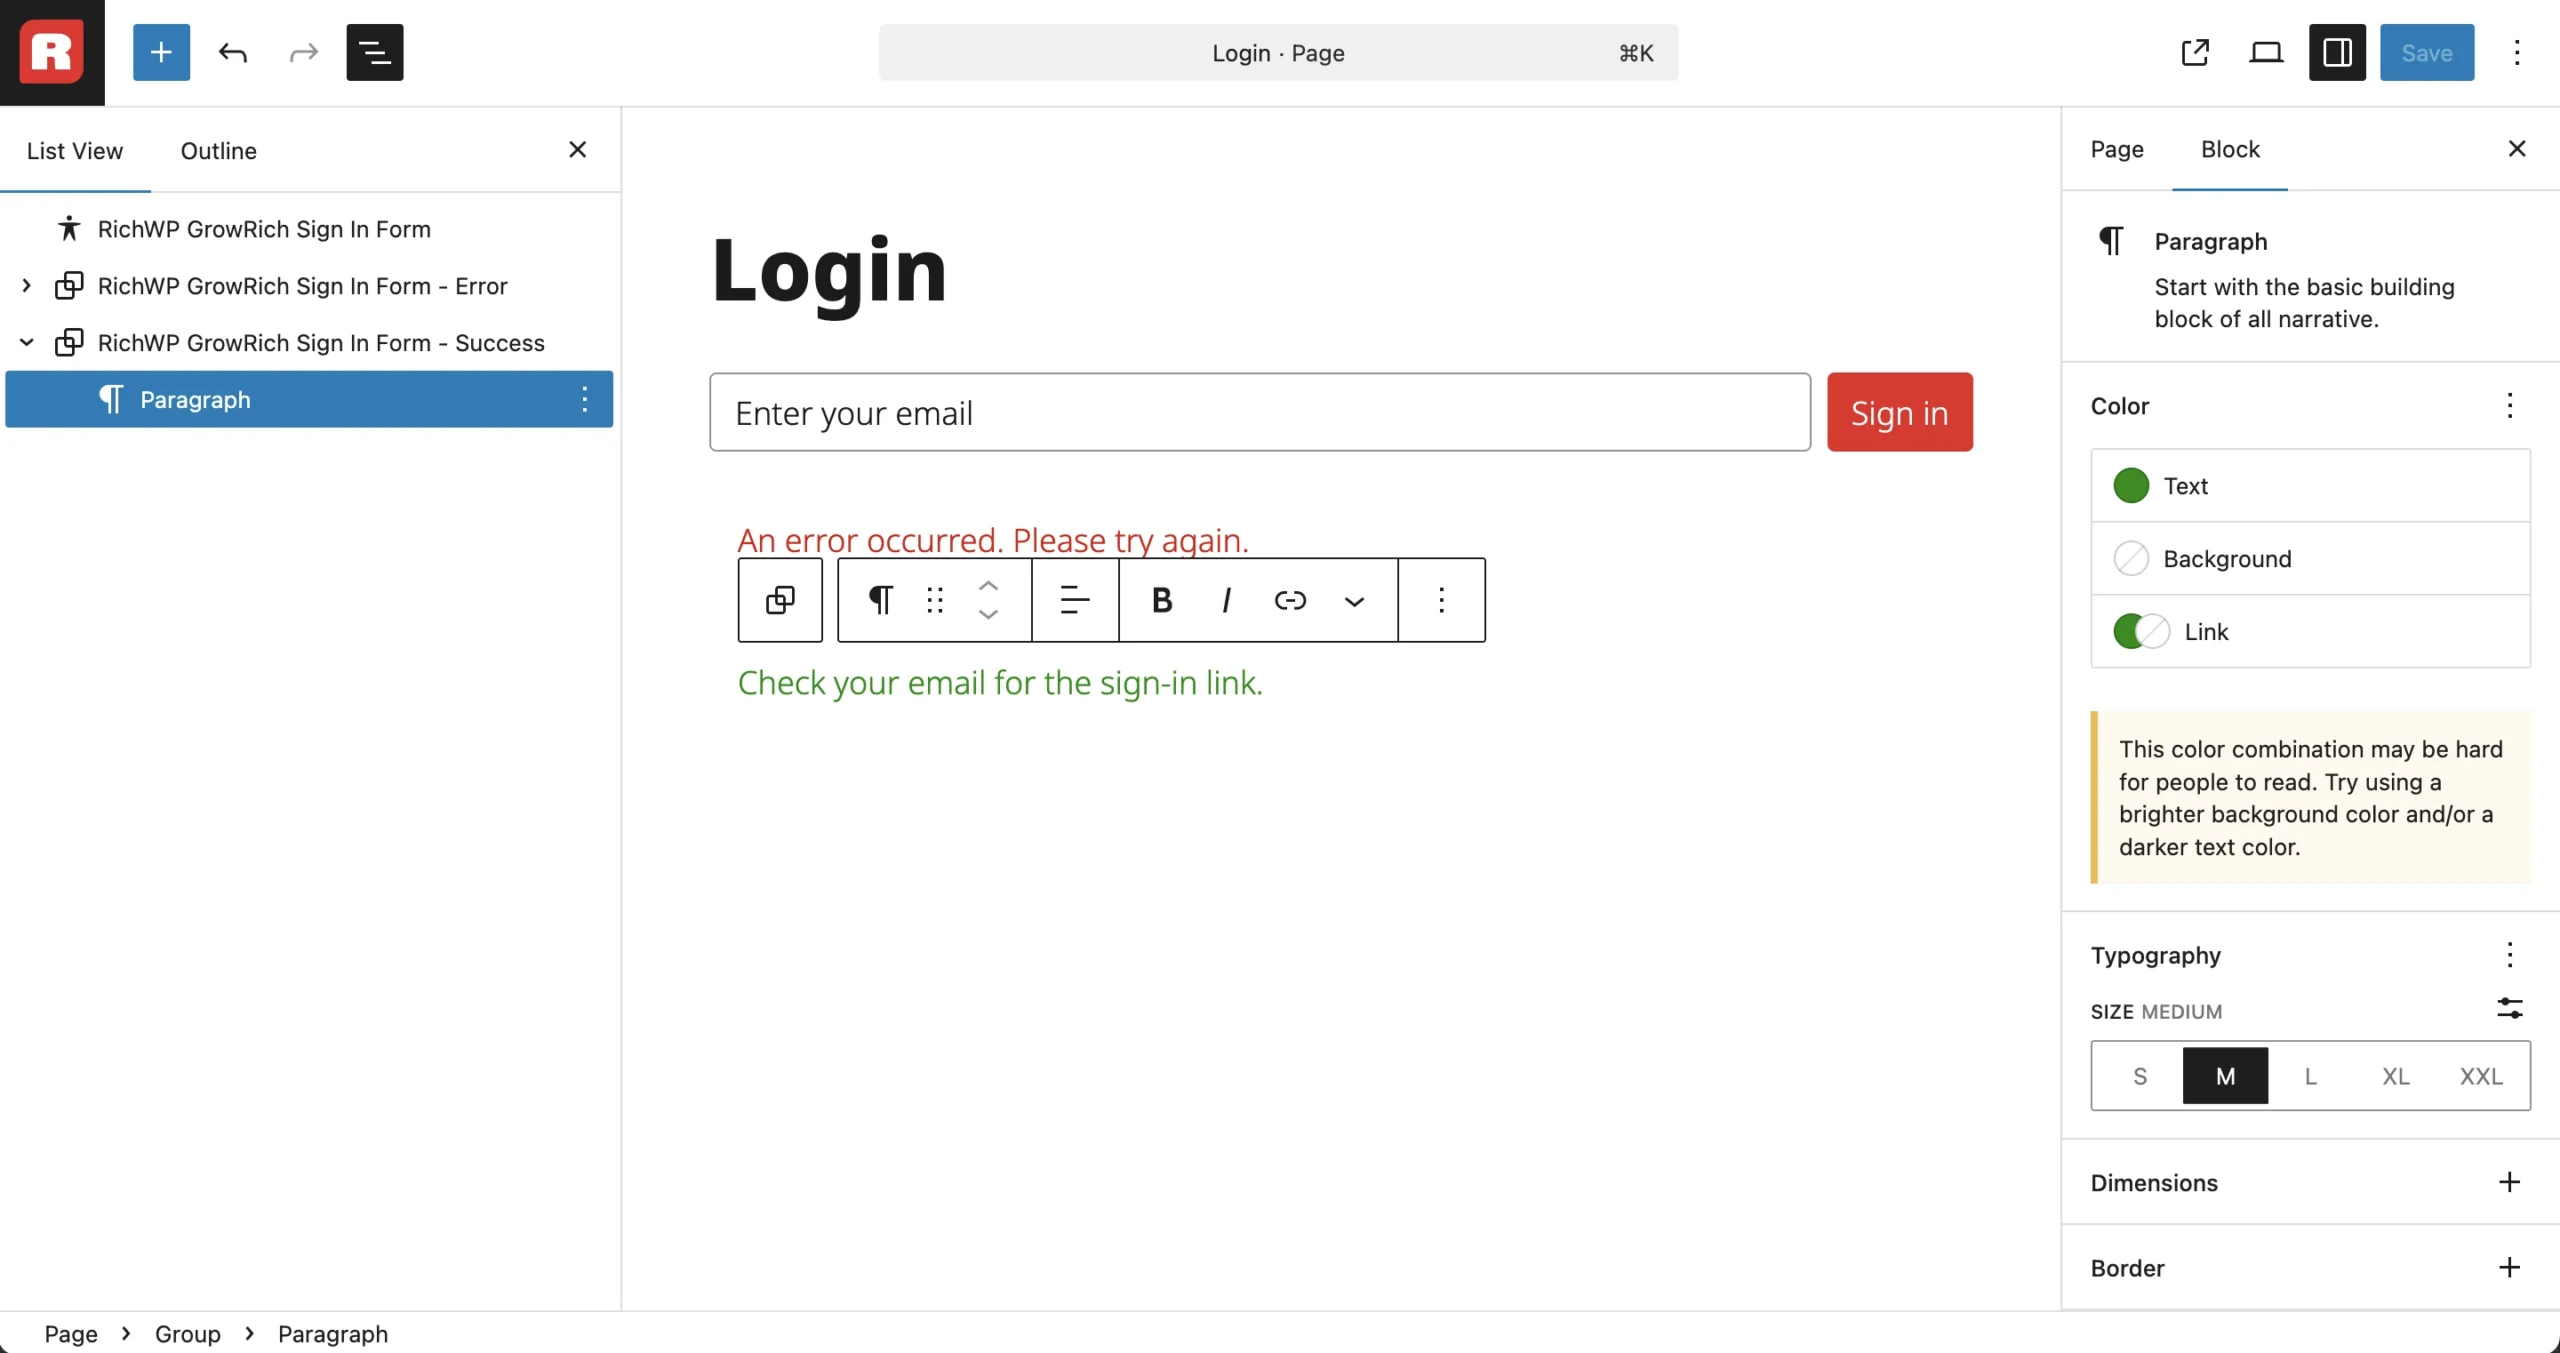
- Login Page: Add the “Sign In” pattern
- Success Page: Add plain content like “Thank you for your purchase!” followed by another “Sign In” pattern.
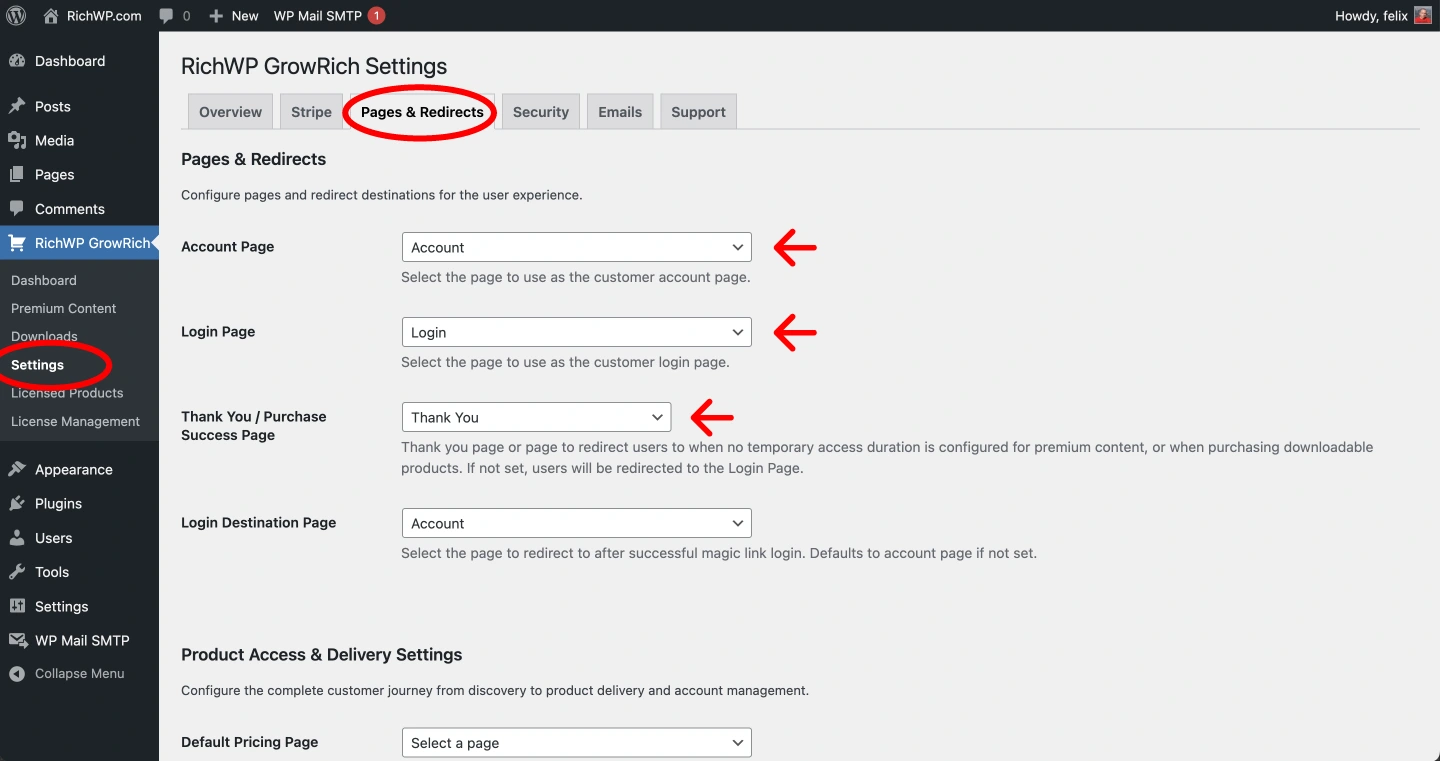
- Go to RichWP GrowRich → Settings and select these pages in the dropdowns
Step 5: Set Up a Downloadable Product or Paywall Product
- In your Stripe dashboard, create a product:
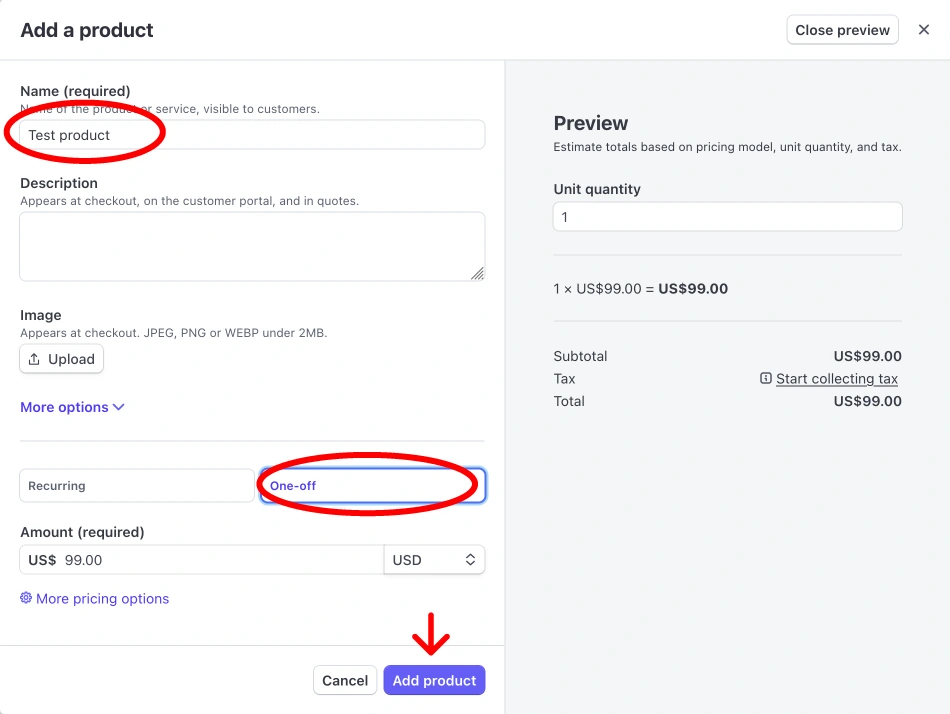
- Go to Products → Create product
- Name: “Test Product”
- Price: $99.00 one-time or recurring for subscription product

For Downloadable Product
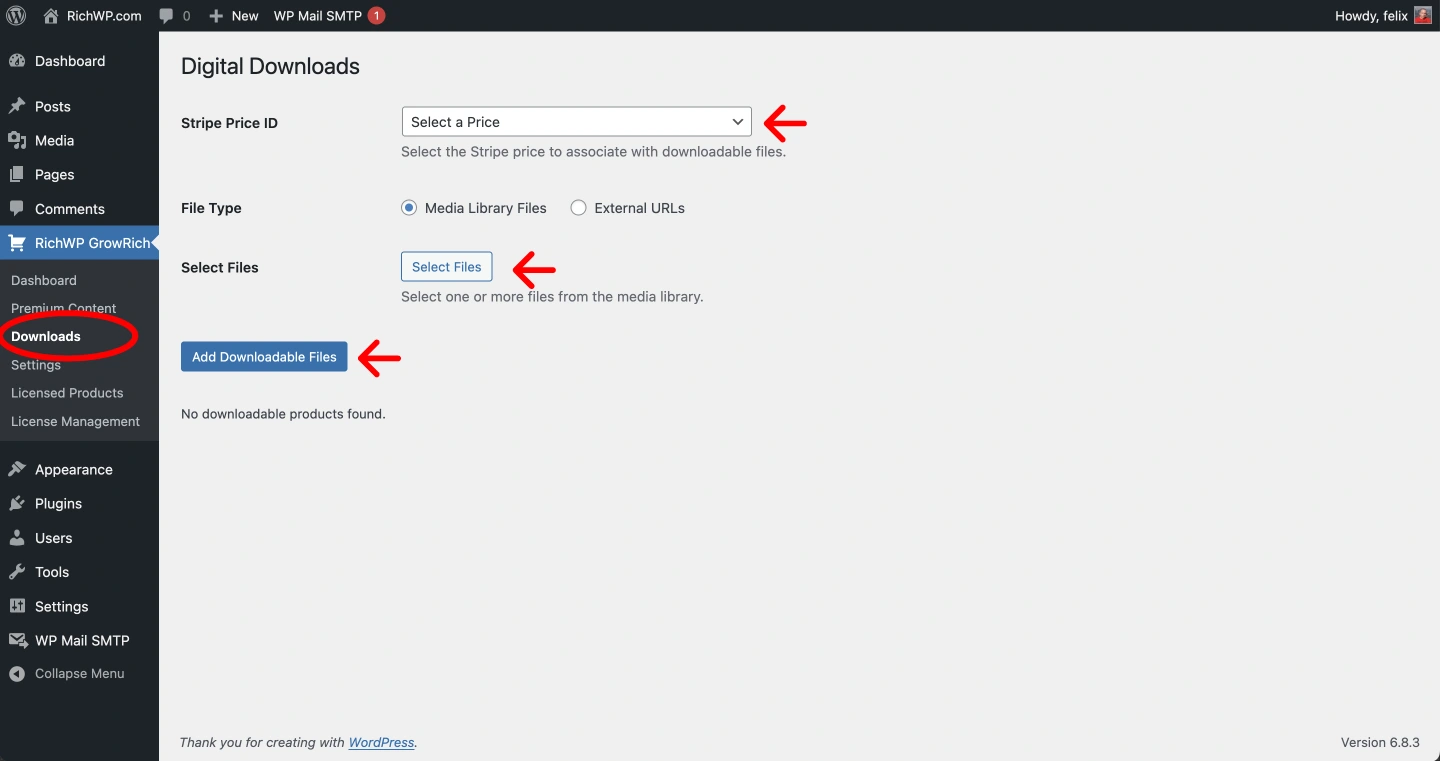
- Back in WordPress, go to RichWP GrowRich → Downloads
- Click Add New Download Mapping
- Select your Stripe price from the dropdown
- Upload a test file or just use an image from the media library for testing.
- Click Add Downloadable Files
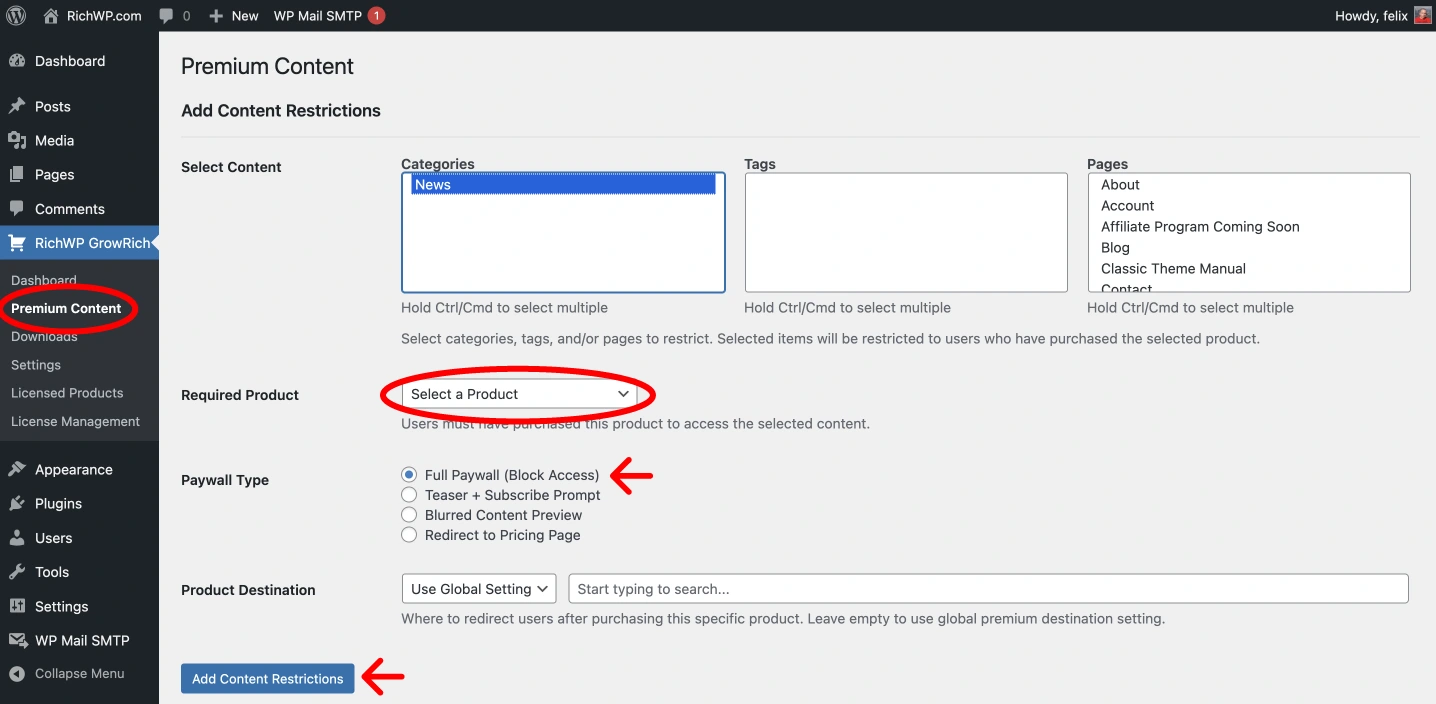
For Paywall Product
- Back in WordPress, go to RichWP GrowRich → Premium Content
- Select a category, tag or page
- Select your Stripe price from the dropdown
- Choose Full Paywall (Block Access)
- leave Product Destination empty for now (testing)
- Click Add Content Restrictions
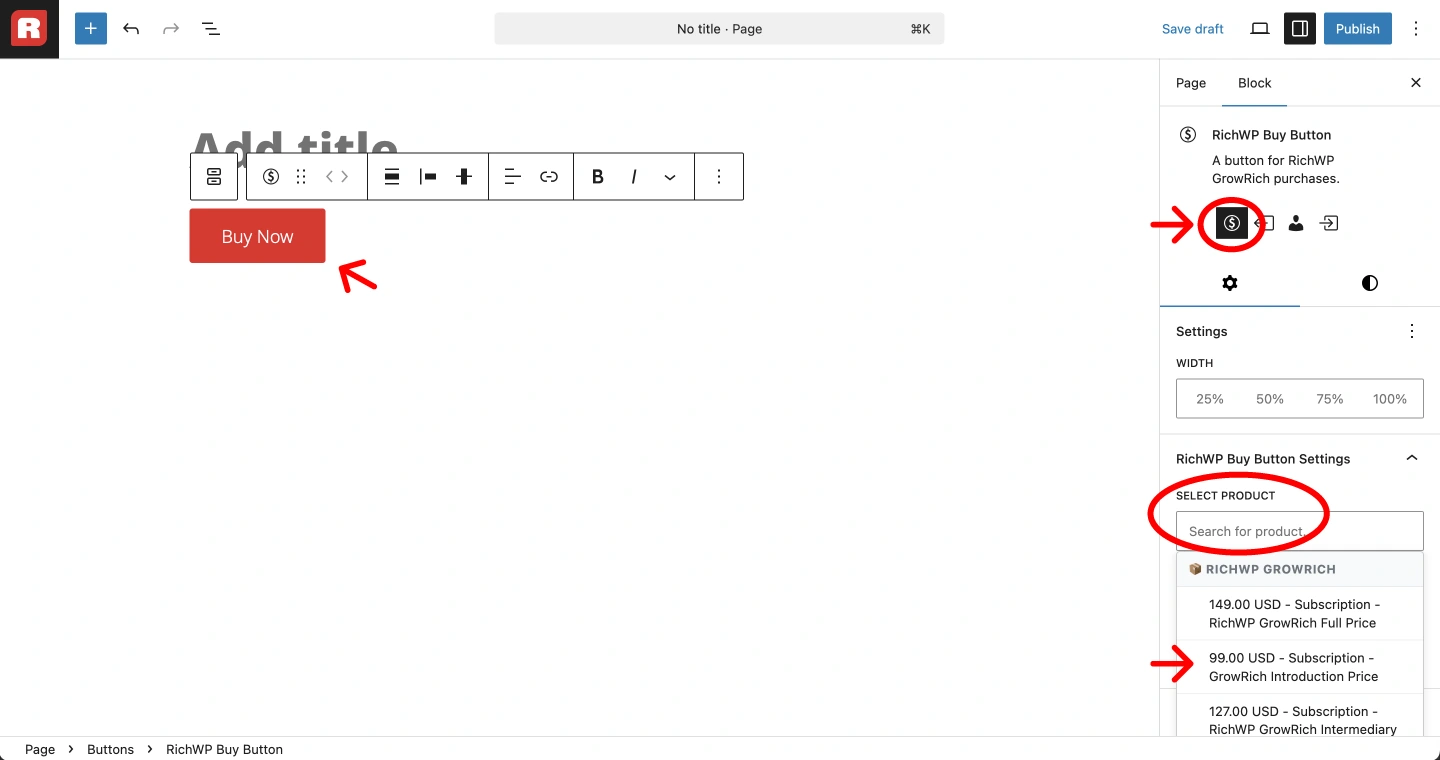
Step 6: Add a Buy Button to a Page
- Create a new page for your product or edit an existing one
- Click the + button to add a block
- Search for “Buttons” and add the Buttons Block
- Customize the button text if desired
- In the block settings, change the button to a Buy Button (the button variation with the $ sign)
- Click Select Products and hoose your test product from the list
- Publish the page

Step 7: Test the Complete Flow
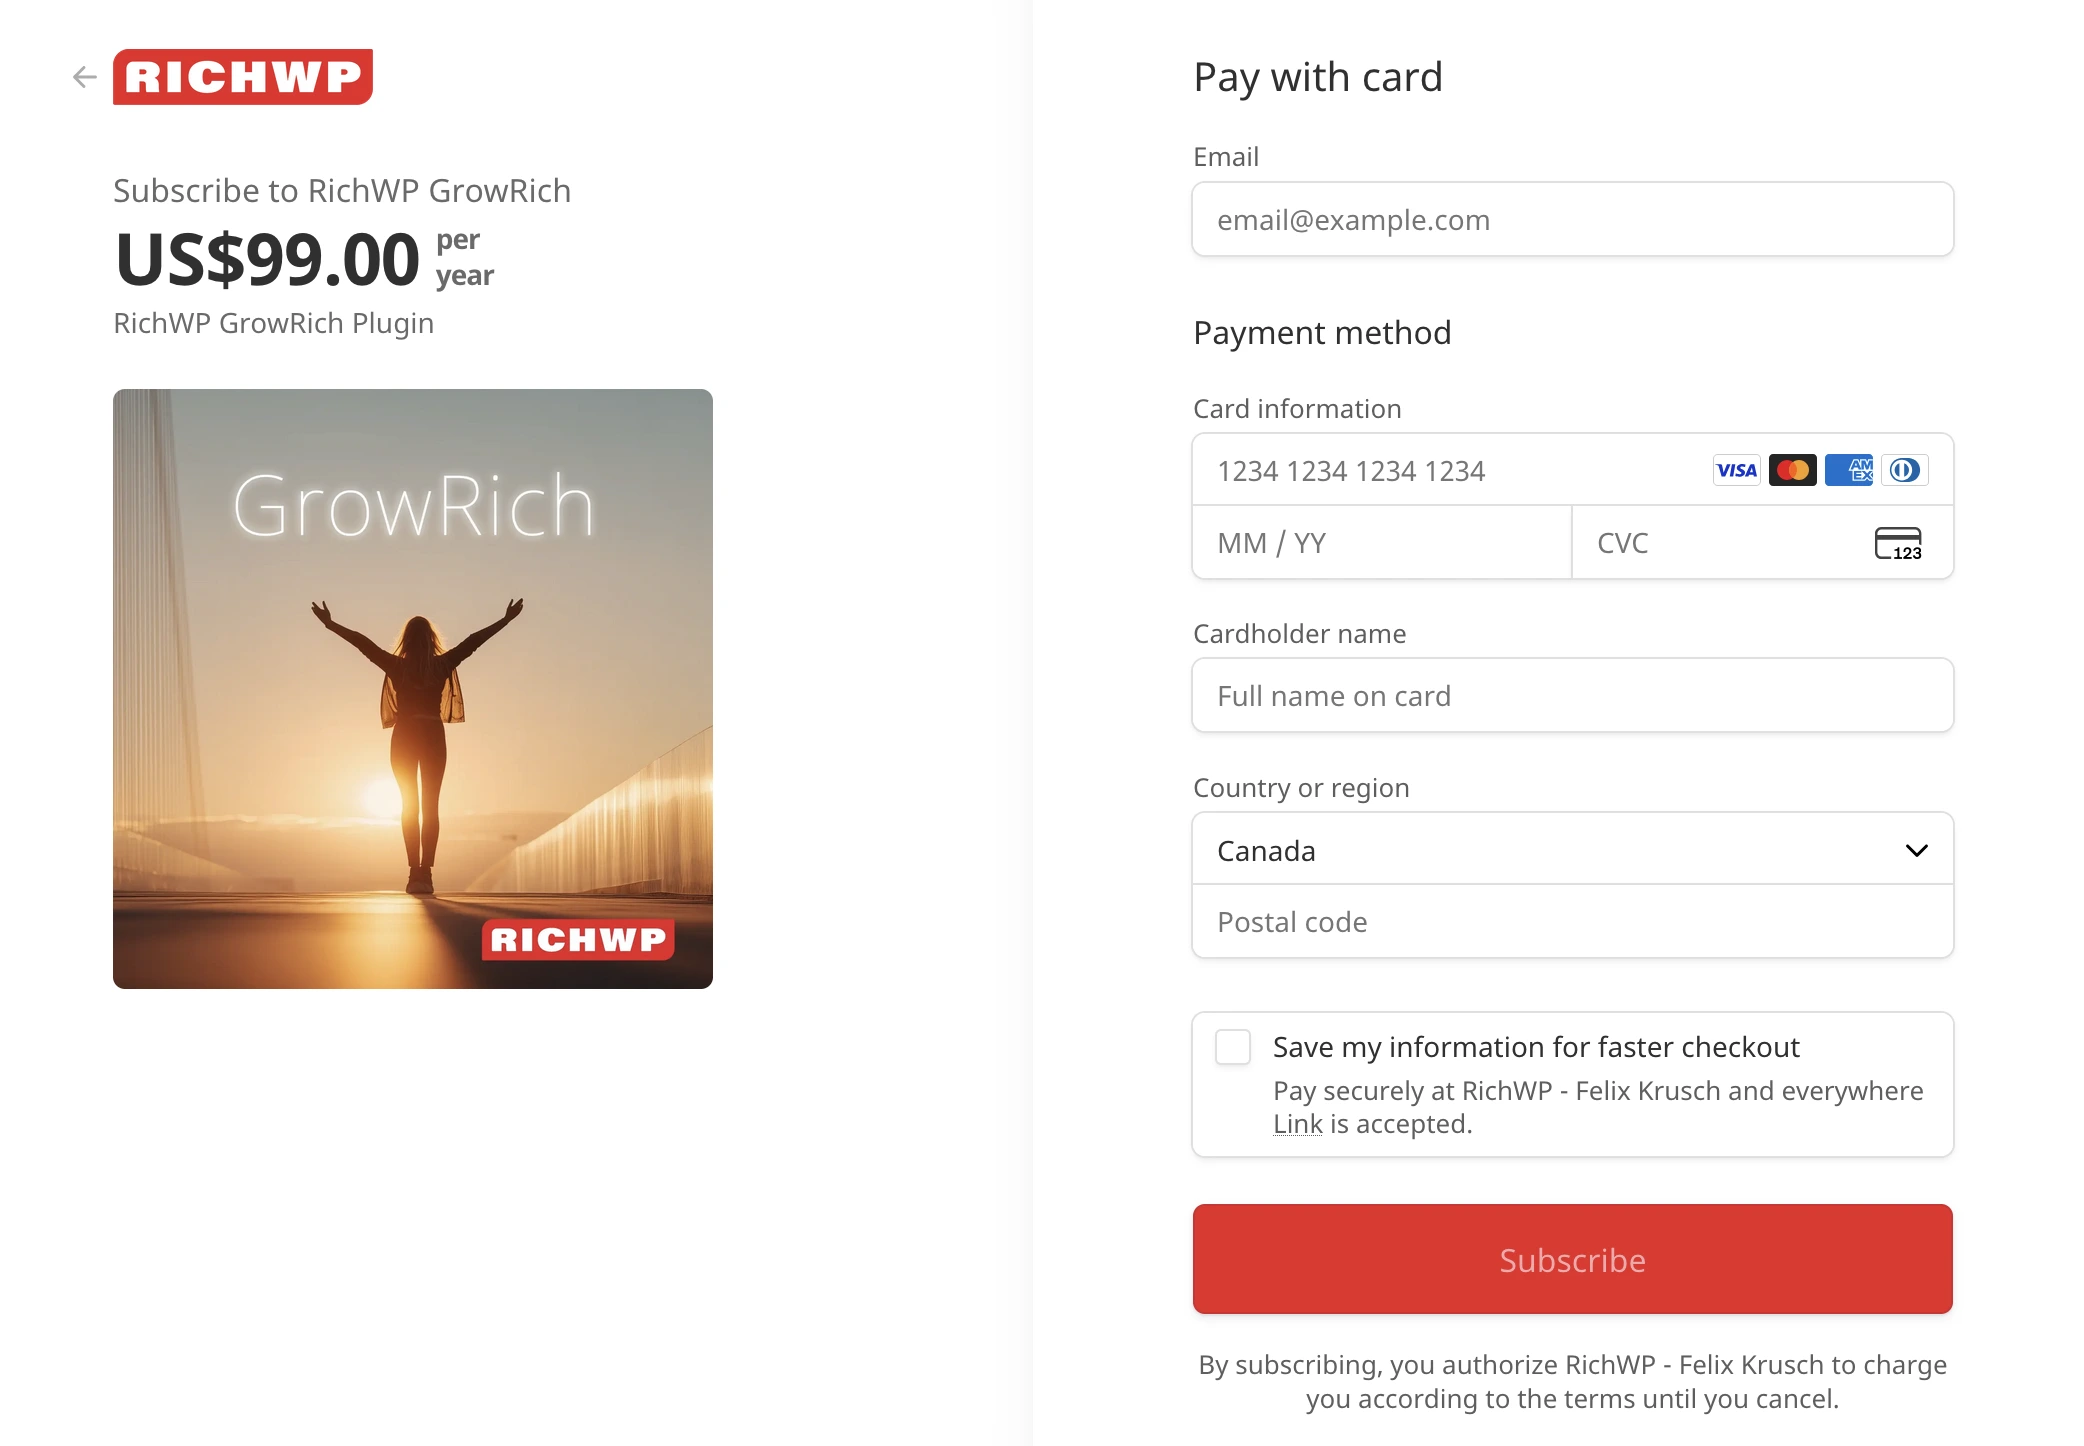
- Visit your page with the buy button (as a non-logged-in user)
- Click the buy button – you’ll be redirected to Stripe Checkout
- If in Sandbox, complete the test purchase using Stripe test card
4242 4242 4242 4242 - After payment, you’ll be redirected to your success page. Type in email to sign in.
- Check your email for the magic login link
- Click the link to access your account and download the file or access your paywall content. if not logged in, a Paywall template will be shown, which you can customize later.
Congratulations!
Your RichWP GrowRich store is now live. The entire setup took less than 15 minutes, adding the next product will be a matter of 2-3 minutes. You now have a fully functional digital download store that’s GDPR compliant and completely stateless.
Next Steps:
- Replace test products with real offerings
- Customize the account page patterns
- Set up content restrictions for premium access
- Configure additional payment methods in Stripe
If you encounter any issues, check the troubleshooting section or contact support.